 This is another late one. I could make a bunch of excuses, but really it’s just that I didn’t have my shit together to get this done on time. No real reason, it just didn’t happen. And I know this is terrible, but I kind of like being late on these because I can learn from everyone else’s mishaps. That’s terrible right? The whole point of this group is that we’re supposed to be baking these things together and sharing our experience and I’m kind of poaching that when I read everyone else’s posts and adjust my methods accordingly. Ugh, sorry. I’m the worst. I’ll endeavor to be better in the future. I really will.
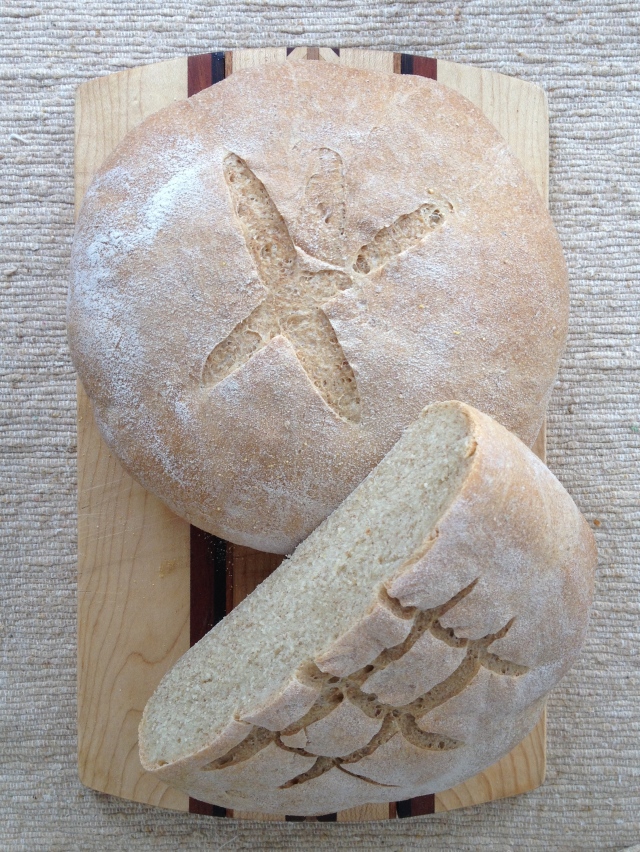
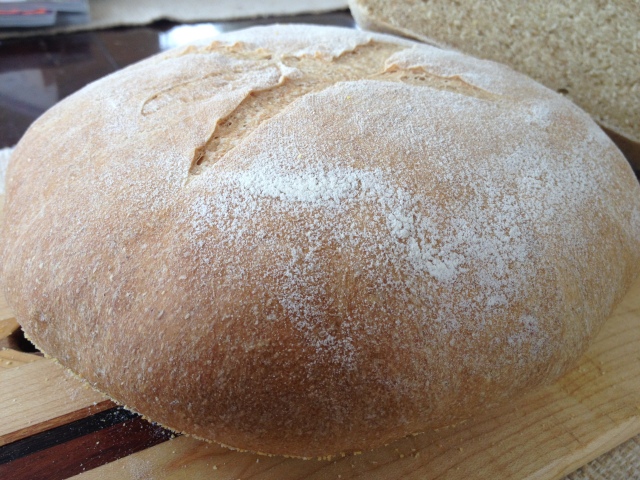
So this bread…it’s pretty, right? Everyone was saying that it made a HUGE monster loaf so I decided to split my dough in half and make two smaller loaves so I could freeze one. This was an excellent notion and the loaves were still a pretty good size. I also replaced the rye flour in the recipe with corn flour, mainly because I had the corn flour on hand, but really because I kinda hate rye. The only time I can stomach it is in a marble rye and that might just be because of this:
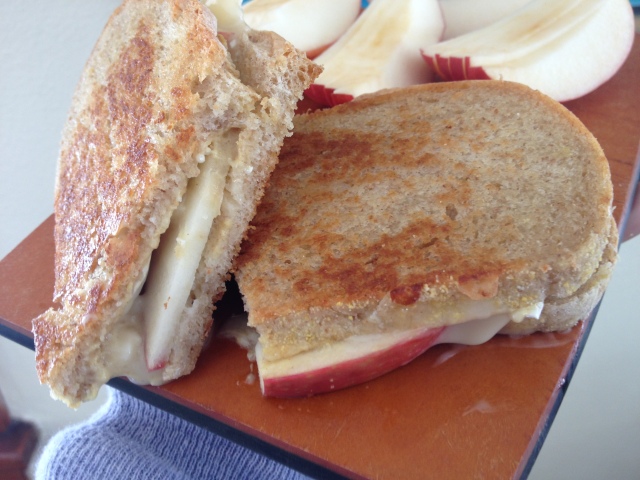
So the corn flour made these loaves a beautiful light color and added some nice, gritty texture to the bread. Is it weird that I like that? Normally gritty is reserved for describing unpleasant things but I don’t think it has to be a negative. So far I’ve made some truly amazing toast with this and a really nice frou-frou grilled cheese made with Dijon, Brie, and apples. Yeah, I’m fancy.
Country Bread (the no-rye way)
(adapted from Baking with Julia, contributing baker Joe Ortiz)
The Sponge
1 1/2 cups warm water
2 1/2 t active dry yeast
1 cup bread flour (I used King Arthur)
1/2 cup corn flour (I used Bob’s Red Mill)
1/2 cup whole wheat flour
Put about 1/4 cup of the warm water into the bowl of an electric mixer and sprinkle the yeast over it, stirring it to mix. Let that rest for about 5 minutes, until it becomes creamy, then add the rest of the water. Stir the 3 flours together in a small bowl and gradually add them to the yeast mixture, stirring with a wooden spoon and mixing until everything is evenly blended. Cover the bowl with a towel and let rise at room temp for 6-8 hours or cover it with plastic wrap and put it in the fridge overnight. If you refrigerate, take the sponge out of the fridge about an hour before you intend to continue with the next step and make sure to use warm water in the next mix.
The Dough
1 t active dry yeast
1 cup water
The Sponge
3 cups bread flour
1 cup whole wheat flour
1 T salt
Dissolve the yeast in 1/2 cup of the water and pour the other 1/2 cup into the bowl with the sponge. Combine the bread flour and the wheat flour in a small bowl and set aside. Attach the bowl to the mixer and using the dough hook, gradually add about 2 cups of the flour mixture at the lowest speed. Don’t forget to lock the head of the mixer in place if yore using a tilt-head and make sure to keep an eye on your machine – mine had a hard time with this dough. After mixing for about 3 minutes, add the yeast mixture and incorporate it well. Sprinkle the salt over the dough and mix that in as well. Now add the remaining flour mixture and settle down for the long mix. The dough should start to clear the sides of the bowl almost immediately. Knead on low speed for about 10 minutes. I ended up turning mine off after 9 because my machine was really struggling and felt hot to the touch. If this happens to you, just knead it by hand for a few minutes until the dough feels right. I know this is weird to say, but after making enough bread you just know. It should be smooth, moist, and pliable. Once you reach the right consistency, place the dough ball in a lightly oiled bowl and cover it with plastic wrap. Let it rise at room temp for 1 1/2 – 2 hours, or until it has doubled in volume.
Make a resting place for the dough by choosing two vessels of equal size (I used two 9″ pie dishes). Line them each with a clean dish towel and rub flour into the dish towel to keep the dough from sticking. Turn the dough out onto a lightly floured surface and using a dough scraper, divide it in half. Place one half back in the bowl and cover it with the plastic wrap while you prepare the other. Pat the dough ball into a disk with your hands and fold all four edges in towards the middle. Using the heel of your hand, smush the middle down, then flip the dough over and use your cupped hands to form the dough into a tight little ball. Repeat this process four more times. Turn the loaf over and lay it flat-side down in your prepared place, folding the towel over to lightly cover the dough for the final rise. Repeat with the second dough ball. Let the loaves rise at room temp for 1-1 1/2 hours.
About 30 minutes before the loaves are ready to bake, position a rack in the lower third of your oven and place your baking stone there. Preheat the oven to 425 degrees. When the dough is fully risen, rub a baker’s peel with cornmeal and invert one of the loaves onto the peel. Using a grignette or razor, slice the top of the loaf in a pattern of your choice (I did one tic-tac-toe and one criss-cross) and then quickly open the oven and slide the loaf from the peel to the baking stone. Reduce the oven temp to 400 and bake the bread for about 40-45 minutes, or until the crust is nicely golden and an instant read thermometer inserted in the bottom reads 200 degrees. Repeat this process with the second loaf. If you like, you can create steam by spritzing the top and sides of the oven with water from a spray bottle before you place the loaf in but I didn’t have one so I didn’t do it.
Let the loaves cool on a wire rack to room temperature before slicing. Store the bread cut side down on a cutting board and it should last about 3 days. I wrapped my second loaf in plastic wrap and then in foil and put it in the freezer where it will keep for up to a month.


That bread looks so beautiful. You are such a good baker. Your creations look lovely and delicious. Hope you are well. Sending love.
I love bread and I will have to try this recipe!
Your bread looks perfect!!!
You’re right, all comments are very interesting and give you a good help!!!
I love your toasts, they sound so yummy!!!!
Well done!!!
Cool idea to use corn flour – I like it 🙂 The sandwiches are also totally down my alley!
Who cares if you were late posting? Your loaf looks great!
Beautifully done, and your sandwich sounds delish!
Beautiful loaves! I loved this bread recipe. And I thought it was especially good toasted. Wish I had made a grilled cheese with mine now!!
Haha on the Seinfeld reference!!
Lovely looking bread. It is indeed a great idea to read about the other’s experiences before venturing. You can avoid the pitfalls. I made half a recipe and still got a huge loaf and since we are only two that went a long way. Wish I had thought of the cheese toast. That looks amazing. It was great toasted too.
I love your loaves: wonderful patterns and colors.
I sliced my “monster” and deep froze them: toasted or defrosted – it’s great in both ways.
But, the next time, I’ll make 2 or 3 smaller loaves, for sure.
Looks delish! Love your grilled cheese. This is a really nice all purpose bread, I think.
Lovely bread! Your sandwich is making me hungry…it looks delish!