Baking with Julia – Vanilla-Sugar Dusted Mixed Berry Muffins

IMG_5320The first day of spring is in two days. I know everyone is sick of winter and it’s nothing new or revolutionary to complain about it lasting forever blah, blah, blah but cripes, I need it to be over. I woke up this morning to a dull, gray, foggy, sleety darkness that didn’t relent all day and it’s just so gross. I bought cute new flats that I’d like to wear. My whole tan that I worked really hard to achieve last summer is gone. Pure, warm sunlight is a distant memory. I want an iced beverage to be appealing, not chill-inducing. Honestly, I want to sweat again. That’s weird, I know. If you’re thinking “Well why don’t you just work out or something?” you should leave now. Just go. That’s not at all what I meant.

Everyone who didn’t click away after that knows what I mean. You guys feel me. You understand.

I’ve been listening to a lot of this instrumental cover of “Hurt” by 2Cellos and maybe that’s also affecting my mood. Who knows? So in an effort to bring some cheer to this cheerless day, I made these muffins this morning. And they did help a little. The rest of the group did this recipe way back in September when I was on hiatus so it’s kind of a catch-up for me. Fresh berries seem to be on sale in all the grocery stores right now but frozen would probably work just as well.

Vanilla-Sugar Dusted Mixed Berry Muffins

1 3/4 cups cake flour

2 t baking soda

1 t cream of tartar

1 t salt

1/2 pint fresh blueberries

1/2 pint fresh raspberries

3/4 cup milk

1/4 cup sour cream

1 stick unsalted butter, at room temperature

2/3 cup sugar

1 large egg, at room temperature

1 large egg yolk, at room temperature

2 T vanilla sugar

Position a rack in the center of the oven and preheat it to 400 degrees. Butter or spray a 12 cup muffin pan, or line the cups with paper liners.

Sift or whisk the cake flour, baking soda, cream of tartar, and salt together. Remove about a tablespoon of the sifted dry ingredients and toss with the berries in a small bowl.  In another small bowl, stir together the milk and sour cream and set aside until needed.

In a mixer fitted with the paddle attachment, beat the softened butter on medium speed for about 3 minutes, until it’s very white and pale. Add in the sugar and beat for another 3 minutes. Add in the egg and yolk and beat for another 2 or 3 minutes, until the mixture is fluffy.

Remove the bowl from the mixer and pour in about half of the dry ingredients, along with half the milk/sour cream mixture. Using a large spoon or spatula, fold in these additions carefully. When everything has just come together, add in the rest of the dry and wet ingredients and continue to lightly fold everything together. Now add the berries, being careful not to crush them while folding. I really hate folding. I’ve mentioned it before. But unfortunately it’s a really necessary technique in baking. You definitely don’t want to overmix these babies. Use a triggered scoop to evenly divide the batter into the 12 muffin cups. You could spoon it too but scoops are where it’s at. Get one if you don’t have one, it’ll change your baking life.

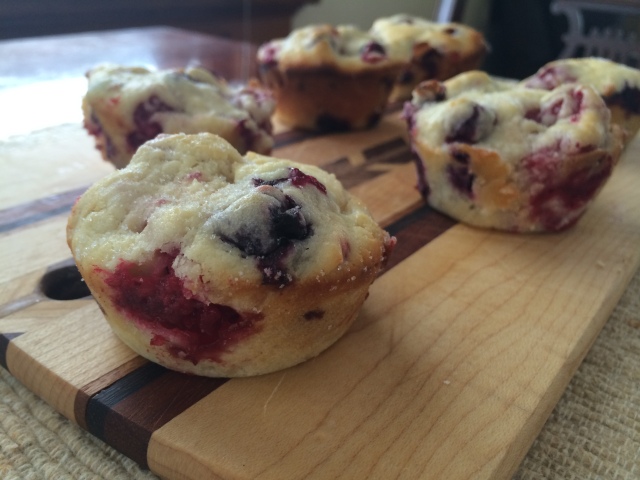
Sprinkle the vanilla sugar over the muffin tops and bake them for 20-25 minutes, or until the tops are just starting to get golden. Let them cool in the pan on a rack for about 15-20 minutes before removing.
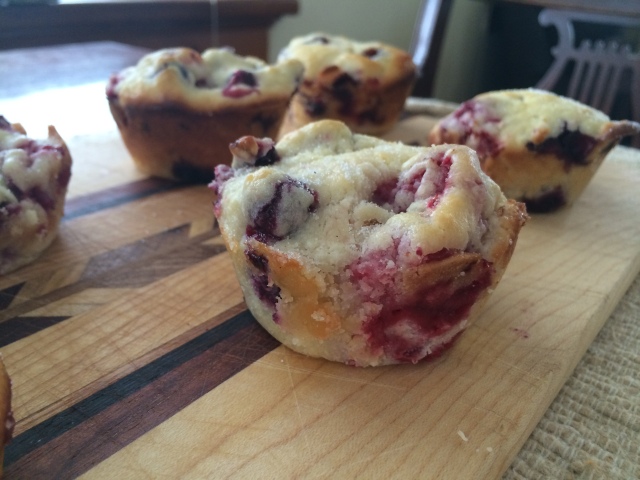
IMG_5319Eat a muffin, it helps with the winter doldrums. Maybe have a few while you fantasize about sandals and wearing only one layer of clothing…or gasp! a bathing suit. And don’t listen to “Hurt” anymore. Wait, who am I kidding? It’s an incredible and evocative song. Listen to it all you want. Just do it in a patch of weak sunlight with a muffin in each hand and you’ll probably be okay. Not that I’m speaking from experience or anything…..
Baking with Julia – Buttermilk Lemon Vanilla Scones

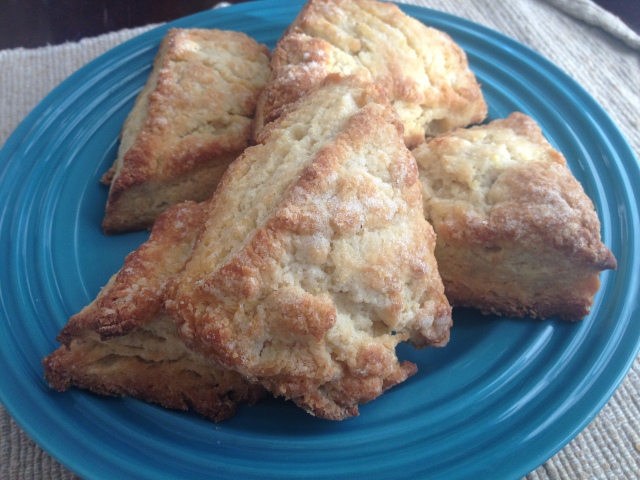
IMG_5076At my old job we sold an inordinate amount of scone pans. Every time someone asked if we had them or where they were or brought one up to the counter, everything in me wanted to say “Please don’t do this. This is a completely unnecessary purchase.” But I didn’t. Obviously. Discouraging customers from purchases is generally frowned upon in retail. It’s just that scones are so simple. You don’t need a mixer, or a special cutter, or fancy ingredients and you definitely don’t need a specific pan. Sheesh.

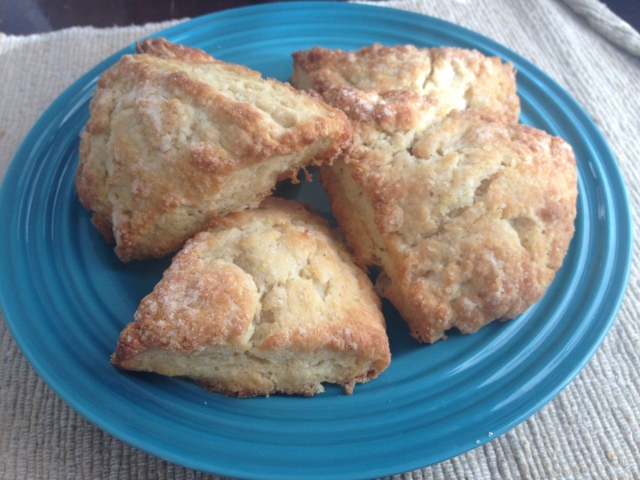
These days simple feels even better than usual. Things you can count on. Things that don’t change. Things that offer comfort at the basest level. Something sweet and crunchy and warm from the oven that I can slather in butter usually covers all the bases. These scones definitely fit the bill. I loved the crunchy crust that formed from sprinkling sugar on the tops before baking. This attribute really only lasts for a few hours after they come out of the oven, so make sure to eat one right away. They’re still good the next day or even re-heated out of the freezer but you really can’t beat a fresh one.

The original recipe for these was even more basic but I really wanted to add vanilla because it seems sad and wrong to not add it to most baked goods. I have this jar of vanilla paste that I never seem to use so I decided to break it out and give it a try. So I un-simpled them a bit, but not much. Still totally reliable, comforting, buttery ol’ scones, heading straight for your face.

IMG_5065

Buttermilk Lemon Vanilla Scones

3 cups all-purpose flour

1/3 cup sugar

zest of 1 lemon

2 1/2 t baking powder

1/2 t baking soda

3/4 t salt

1 1/2 sticks very cold unsalted butter, cut into cubes

1 cup buttermilk

2 t vanilla paste

2 T butter, melted

Position the oven racks to divide the oven in thirds and preheat it to 425 degrees.

Put the sugar in a small bowl and add the lemon zest, rubbing it into the sugar with your fingers to release the essential oils. This smells amazing and is really tactile and fun – I try to incorporate this technique into any recipe I can. I just think it distributes the citrus flavor really well throughout the finished product. Reserve a small amount of this sugar to sprinkle on the scones just before baking.

In a medium bowl whisk together the flour, sugar, baking powder, baking soda, and salt. Add the cold butter pieces and cut them into the flour mixture with a pastry blender (or a fork, or your fingers) until the mixture resembles coarse cornmeal. Try to leave some larger pieces of butter mixed in with the little ones as this will add to the flakiness of the finished scones.

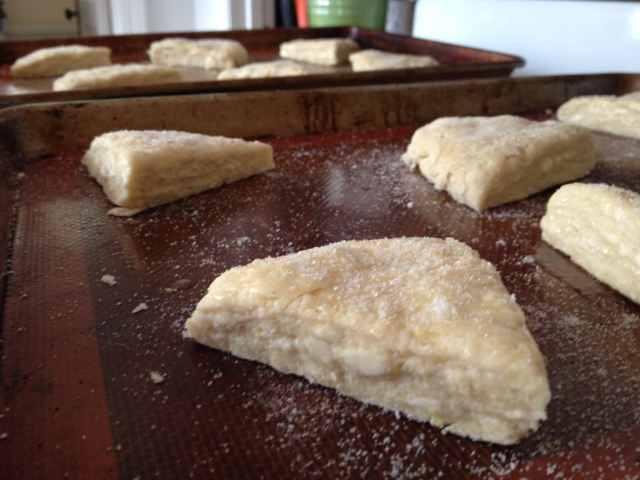
Pour the buttermilk into a glass measuring cup and whisk in the vanilla paste. Add the vanilla/buttermilk mixture to the dry ingredients and mix until just moistened. You do not want to over-mix. Bring the dough together into a ball and turn it out onto a lightly floured work surface. Knead it very briefly, then divide the dough into two equal pieces. Pat each piece into a circle about 7″ across, then use a sharp knife to cut the circle into 6 triangles. Place the scones on a baking sheet (the original recipe said an un-greased baking sheet but I used my Silpats because I am lazy and don’t like washing baking sheets. Bottom line – use your discretion) brush them with the melted butter and then sprinkle them with the lemony sugar you set aside. If you forgot to set some aside, it’s no big deal. Just use regular sugar. Or do what I did and remember that you have some vanilla sugar and use that. Whatever you feel like.

Bake the scones for about 12 minutes, until they are really golden and beautiful and then let them cool on a wire rack. Eat them while they’re still warm, you won’t regret it.

IMG_5075

Sun-dried Tomato, Spinach, & Mozzarella Quiche

IMG_4902

I started a new job a few weeks ago and for the first time since high school, I have to pack a lunch. I mean, obviously I brought lunch to work in the last 10 years, but this has to be a lunch that needs no microwave which is a new restriction. Most of my leftovers usually require a reheat and sandwiches get kind of old so I’m on the lookout for things to make that can be eaten cold or at room temp. A quick jaunt through my mental catalog of meals brought me to the conclusion that quiche is basically the queen of no-muss, no-fuss anytime eating. They’re kind of amazing that way. Shockingly, I did not even need a trip to the grocery store to accomplish this – I just kind of threw it together with things I had on hand. Something about doing that just makes me feel like I’ve made it as a competent adult so I’m sure I’m going to do something really dumb in the next few days to knock me off my moderately high horse. I’m waiting for it.

Sun-Dried Tomato, Spinach, & Mozzarella Quiche

2 T unsalted butter

1/2 cup finely diced onion

1/2 t dried thyme

salt & pepper

10 oz frozen chopped spinach, thawed and squeezed to remove excess moisture

1/2 cup sun-dried tomatoes, roughly chopped

2 eggs

3/4 cup milk

1/2 cup mozzarella (I used fresh cigliene but you could also use shredded)

1/4 cup parmesan, shredded

1 pie crust, partially pre-baked and cooled (I used this one)

Center a rack in the oven and preheat it to 350 degrees. While the oven heats, melt the butter in a medium skillet and add the onions, thyme, salt, & pepper. Cook the onions until they are soft and translucent but not brown, about 5-7 minutes. Remove the skillet from the heat and set it aside to let the onions cool a bit. Crack the eggs into a large glass measuring cup and beat them slightly, then add the milk and whisk until smooth. Salt and pepper this mix too – just use your judgement, not too much and not too little. Sorry, I really believe seasoning is a personal matter.

IMG_4901

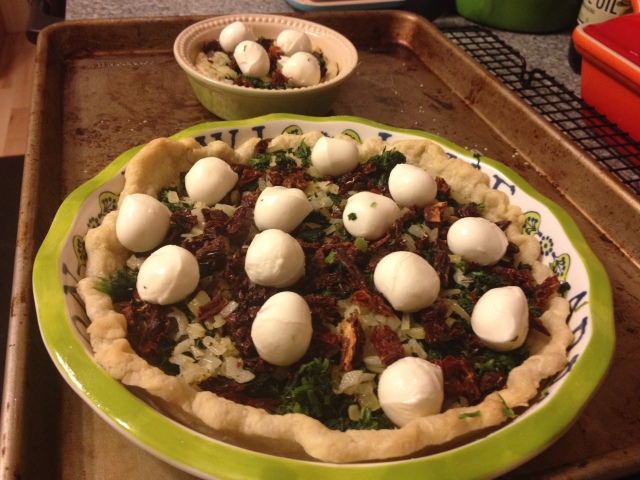
Scatter the spinach over the bottom of the cooled crust, spreading it evenly. Now throw down the onions and sun-dried tomatoes, again making sure to spread them evenly around. Place the mozzarella balls at appropriate intervals around the quiche-y landscape. If you’re using shredded mozzarella instead, mix it with the spinach before you spread it in the crust. Now pour the egg and milk mixture over the whole mess to really seal things together and top it with the shredded parm and we’re almost home-free. Put the quiche in the preheated oven and bake until things look golden and puffy and delicious, about 45 minutes.

Cool on a wire rack until room temperature, then dig in! Quiche is a super-food (no, not in the way you’re thinking) since it can be eaten for breakfast, lunch, or dinner and enjoyed cold, room-temp, or reheated. In closing, quiche is awesome and I’ll brook no arguments, thanks.

In case you’re like, “Pre-bake the crust? What the hell is that all about?” there are super-easy directions at the bottom of the pie crust recipe I linked. Read them and commit them to memory and you’ll never have a soggy pie crust again. Soggy pie crust is the worst. It’s even worse than shrunken pie crust, which I have still never managed to avoid, no matter how closely I follow the directions. But a shrunken pie is better than no pie at all, wouldn’t you agree?

Also shrinkage, it’s a thing.